Sunday, August 9, 2015

Adding a driveway and walkway

After a year of living with a natural "dirt" driveway, we decided to have a paver brick driveway installed. WE chose this over a cement driveway because of the number of large mature trees. We felt within time, the roots would cause multiple cracks in the cement, where the pavers will give and not crack.  This job required a second survey and about 6 months of waiting, but turned out beyond our expectations.
Here is the finished project in a youtube video link that you will need to copy and paste:

https://www.youtube.com/watch?v=qVSBhmhfskI&feature=em-upload_owner


                                                               THE JOB BEGINS


BRICKS BEING LAYED


THIS IS HOW THE PAVERS APPEAR BEFORE BEING CUT ALONG THE EDGES


AFTER THE EDGES ARE CUT


Monday, July 27, 2015

Adding wood flooring to hall

This week was a bit of a challenge. Half of the hallway we created has 100 year old heart pine which has a wonderful variety of  colors. We wanted to complete the hallway with matching wood but could not find the same varieties of color with available pine. We did find the right size clear high grade pine with no knots and decided to try and use a variety of stains to create the old heart pine  look. A solid stain would have looked like a 4' wide and 9' long patch.


                            This how the hall looked after the original floors were refinished. Notice the variety of colors in the 3"  wood strips.


Here I am  applying the first layer of conditioner and stain after adding 9' of additional tongue and groove pine to finish the hallway.


Using a pallet to hold my oil paint pigments, I mixed mineral spirits with  burnt sienna, yellow ochre, and raw umber to create a variety of stains so that each piece of wood would be a little different like the original. This is the completed floor. It also  looks like it is  time for a new pair of shorts :0)


Three coats of polyurethane later and the old and the new come together

Looking back 18 months ago, a video

I just came across this video taken about 18 months ago when the house was at it's early construction phase. Brings back memories and shows me how far we have come on this journey.

It appears you must copy and paste this link to see the video.

https://www.youtube.com/watch?v=WuFo3Qs-3SA

More kitchen details

Some time ago, we made the cabinets above the stove  using two old vintage glass doors that we found  at an architectural salvage store  in West Palm Beach . The doors were originally a light yellow green. With the new sea glass colored glass back splash, the door color had to be changed. The inside of these upper cabinets were painted turquoise and the outside light to match the base cabinets.


Also painted the vintage "Icebox" to  break up what was becoming an all white kitchen.


Glass back splash tiles next to icebox color


Adding more charm and character to the kitchen

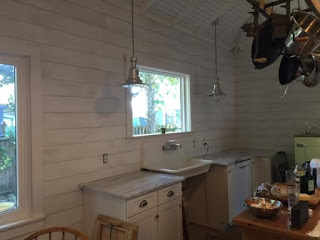
In previous posts, I discussed how we applied a wood shiplap wall over the new drywall to the living room. It really turned out wonderful and created the old cottage look we were trying to preserve.
It was now time to do the same treatment in the kitchen. The kitchen was a new  addition that we had added to the back of the existing house and the  walls were covered with drywall

                                                     THE PROCESS BEGINS

Started adding the 6" wood strips at the top which keeps a full piece at the top.


SOME PIECES WERE TRICKY TO CUT


FINISHED


Adding some details

As a painter, it is said that "the devil is in the details". Probably would be better stated to say that the details can add much to a project. The details are, in  many cases, the first thing people notice when entering a room or looking at a painting.

Decided to make and add a palm tree detail in the form of a corbel or roof bracket at the end of the hall that brings you into the kitchen dining area. It turned out to add a nice and inviting beach cottage touch.


When we bought this cottage, the only bedroom, now the guest room, had vertical batten strips from floor to ceiling to hide the joints in the wall material (upson board).  When we removed the old wall material for new drywal and wiring and insulation, we saved the wood batten strips to reinstall to preserve the original look and character.

APPLYING BATTEN STRIPS ON WALLS AND CORNERS


PAINTING THE BATTEN STRIPS


FINISHED GUEST BEDROOM


New wood floor for the caretakers bedroom

Our bedroom was part of the addition and started with a concrete floor. We knew we wanted a wood floor to tie this room in with the rest of the house so had the concrete poured 1 1/2  inches lower to allow a 3/4 inch sub floor and a 3/4 inch floor. My brother and I installed the sub floor some months ago but this week we installed the tongue and groove  pine floor.

Finding a stain that closely matched the living room was tough. After buying several stains and mixing them together in different amounts , finally came up with an acceptable formula. After applying a wood conditioner to allow the stain to be more even, applied the stain followed by three coats of polyurethane.

                                       ROOM WITH SUB FLOOR OVER CONCRETE


INSTALLED PINE TONGUE AND GROOVE


FINISHED FLOOR


SHOWING TRANSITION FROM OLD TO NEW